Company Logo
DocEndorse
Help
Get Started Get Started
Home Help Blog
  • Getting Started
    • Account Opening
    • Purchasing A Plan
    • Set Up Account
    • Adding A Digital Signature and Initials
    • Setting Permissions
    • Sending Your First Document Out For Signature
    • Self-Signing A Document
    • How A Recipient Signs A Document
    • How Does This Work
  • General
    • Managing Notifications
    • Handling PDF Copies
    • Customize date format and time zone
    • Set Up Branding
    • Set Acceptable Signature Types
    • How To Upload Documents
    • Password Protect Signing
    • Requesting Signer Attachments
    • Adding An Attachment To Requests
    • Ewitnessing A Document
    • Getting Documents Signed In Person
    • Tracking E-sign Requests
    • Handling Audit Trails For E-signatures
  • Users and Teams
    • Creating A Team
    • Invite New Users
    • Inviting New Team Members
    • Inviting New Members To A Sub-team
    • Sharing Documents With Team Members
  • Productivity
    • Creating A Template
    • Using A Template
    • Send Bulk Signature Request
  • Handling The Editor
    • Adding Object Fields
    • Resize, Remove, and Move Object Fields
    • Sign, Date, or Initial a Document
    • Setting Editor Layout
    • Approve or Disapprove A Document
    • Responsiveness of the Editor
    • Live Search Document
    • AI Powered Field Detection
  • Integrations
    • Integrations
    • Google Workspace Integration (DocEndorse Connect)
    • Connect With Office 365
    • Signing/Redacting Documents Within Microsoft Outlook
  • Collecting Payments
    • Connecting to Your Bank Account
    • Managing Your Payment Transactions
    • Preparing Documents To Collect Payments
    • Setting Up payments On Your Account
  • Managing Contacts
    • Adding A Contact
    • Editing or Deleting A Contact
  • Reports And Analytics
    • Get Reports
  • Managing Subscriptions
    • Managing Your Subscriptions
    • Cancelling Your Subscriptions
    • Updating Your Subscriptions
    • Updating Your Payment Method
  • Redact Documents
    • How to Redact A Document
    • Quickly Find and Redact Text
  • Managing Documents
    • Managing Your Documents
  • Using The Ai Agent
    • About Our AI Agent
    • Our Document Intelligence
    • Using the Ai E-sign Assistant

Resize, Remove, and Move Object Fields

Single Item Operations

You can place an object field onto the document by dragging the field from the side bar and dropping it on the page that you want to edit. Please Keep in mind that object fields dropped onto a page cannot be dragged to another page. After dropping the field on the page, you will have several options to re-position the field.

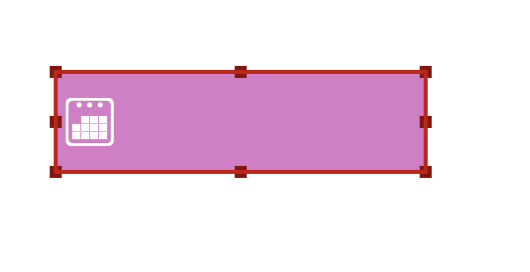
If you want to re-position an object field you simply drag it in the direction that you want to position it. A single tap or click on an object field activates the resize handles. You can position your finger over any of the handles and drag it in the direction that you want to expand or reduce the field.

Resize Object

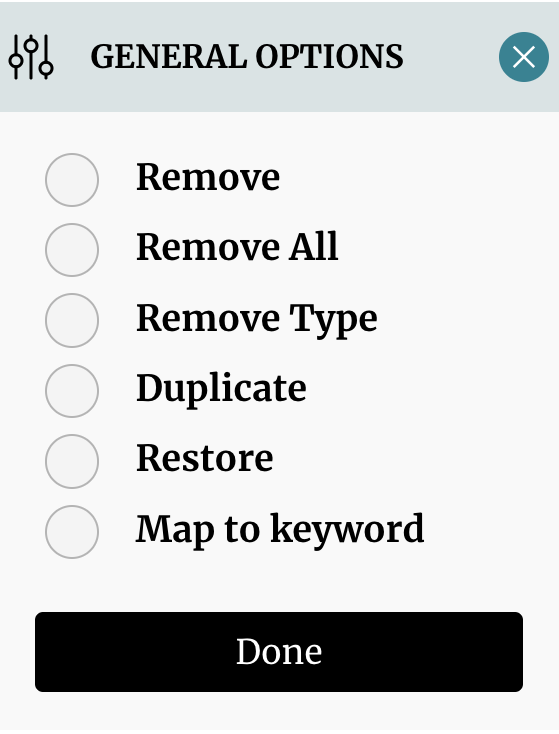
Additional positioning options can be found in the general context menu, which can be retrieved by long pressing for 3 seconds, or right clicking on the object in question. This context menu allows you to, among other things, duplicate the current object field and map this field to a keyword. When you map an object field to a keyword the system will automatically determine the position of the object field in question relative to the keyword you choose, and then replicate the object field and position them at the same relative position to all subsequent keywords.

General Options

Operating on Multiple Items

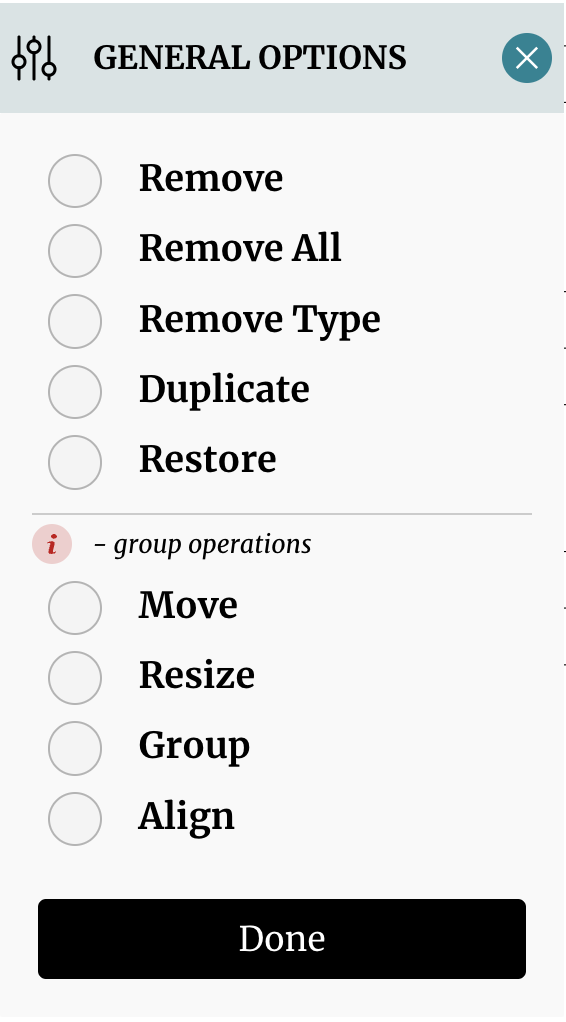
If you want operate on multiple items at once, you can drag a rectangular section (or pinching the case of a mobile phone) over all the items in question. You can then select the appropriate option to apply it to all of the items.

Select Multiple Items

Group Positioning

You can group object fields so that they can be manipulated as a single item. This is done by dragging a rectangular section (or pinching the case of a mobile phone) over all the objects that are part of the group, and selecting "group" on the context menu that pops up. With all the items now considered part of a group, the user can now move, align, or resize all items simultaneously. The user can also center and align all the items left or right.

Grouping Items

Company Logo

Whether you're handling 10 documents or 10,000, our AI-powered signing assistant will save you time, reduce errors, and close loops faster.

© DocEndorse. All Rights Reserved

Connect with us:
Facebook Twitter

Product

Pricing
Features
Book a demo
E-sign For Free
Integrations

Resources

Legal
Compliance
Help Center
Blog

About

Contact
Privacy
Terms