Redact Documents
To redact documents, you must first login to your account and enable the redaction add-on if you haven't already done so. You can do this from the "add-on" page. You should then go to the hub and click on the "Redact Documents" tab to start the redaction workflow. If this is not immediately visible on the hub page, you should use the green menu button at the top right section of the screen to open the flyover menu.
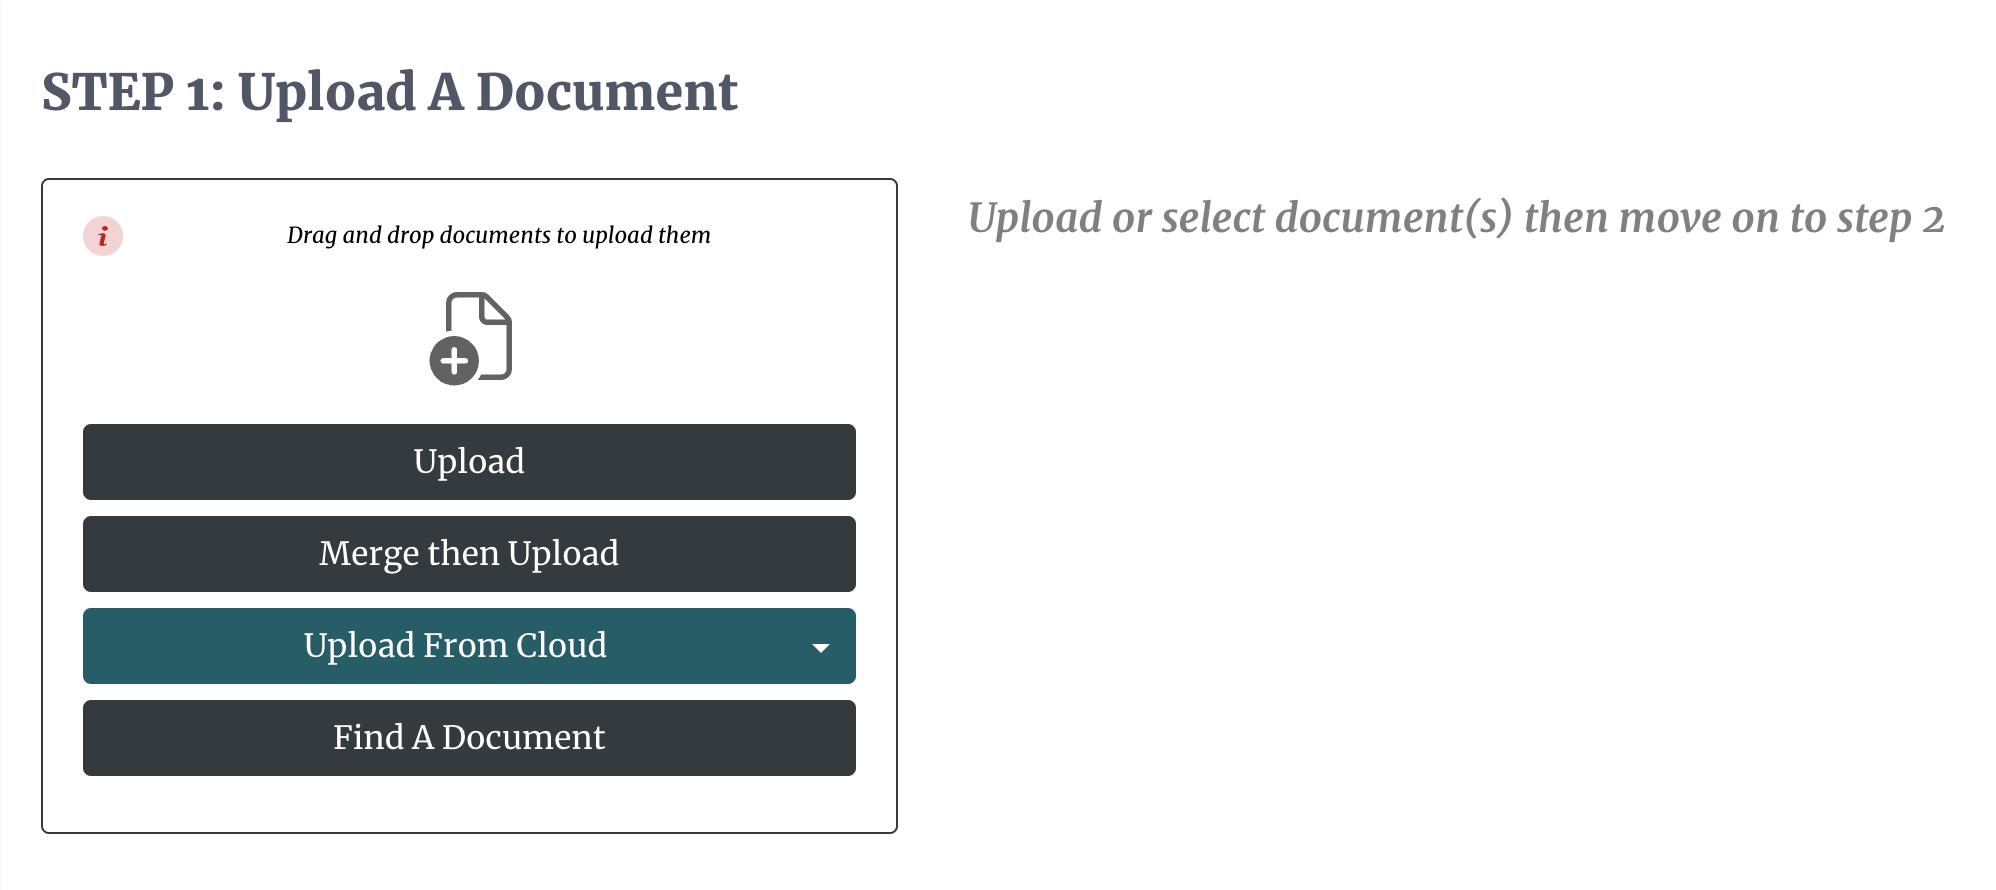
You can erase all selected traces of text or metadata from a document in a simple 3-step process:
- Upload: Our platform facilitates direct upload and the secure transfer of documents from third-party cloud providers such a OneDrive, Google Drive, or Dropbox. All documents uploaded to our platform and all communications done on our platform are encrypted, which heightens the security of the documents on our system.
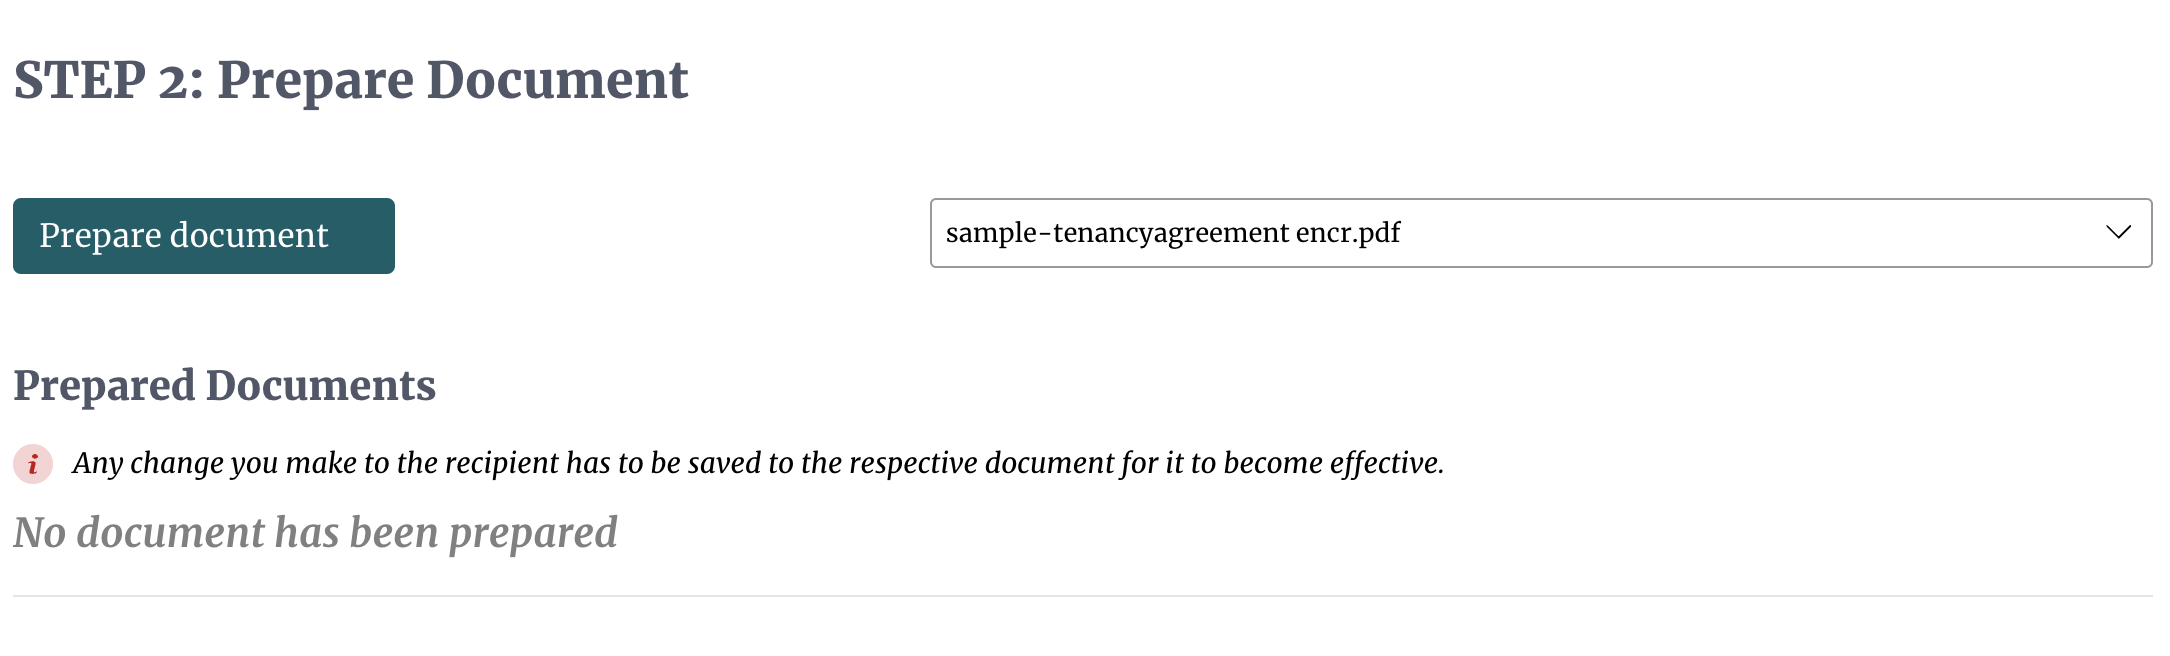
 2. Prepare Document:
Once uploaded, you then select the document you want to redact, and it opens up our redaction editor to begin the redaction process. Our redaction editor comes with a number of tools that allow you to preview and redact documents quickly and easily. We have the pen tool for fine-tuned redaction, the box tool to select whole paragraphs or a whole section, the search tool to find specific keywords or phrases, and we have the AI tool that redacts text based on data categories. You can also map a redaction box to a specific text and have that text redacted throughout the document. It is important to note that the black boxes that show what text will be redacted can be resized according to your preference, and that you double-click on each box to bring up its redaction options. If you are interested in redacting the metadata, you simply select the information tool in the taskbar at the top. This will bring up a context menu that allows you to view and redact any metadata in the document.
2. Prepare Document:
Once uploaded, you then select the document you want to redact, and it opens up our redaction editor to begin the redaction process. Our redaction editor comes with a number of tools that allow you to preview and redact documents quickly and easily. We have the pen tool for fine-tuned redaction, the box tool to select whole paragraphs or a whole section, the search tool to find specific keywords or phrases, and we have the AI tool that redacts text based on data categories. You can also map a redaction box to a specific text and have that text redacted throughout the document. It is important to note that the black boxes that show what text will be redacted can be resized according to your preference, and that you double-click on each box to bring up its redaction options. If you are interested in redacting the metadata, you simply select the information tool in the taskbar at the top. This will bring up a context menu that allows you to view and redact any metadata in the document.
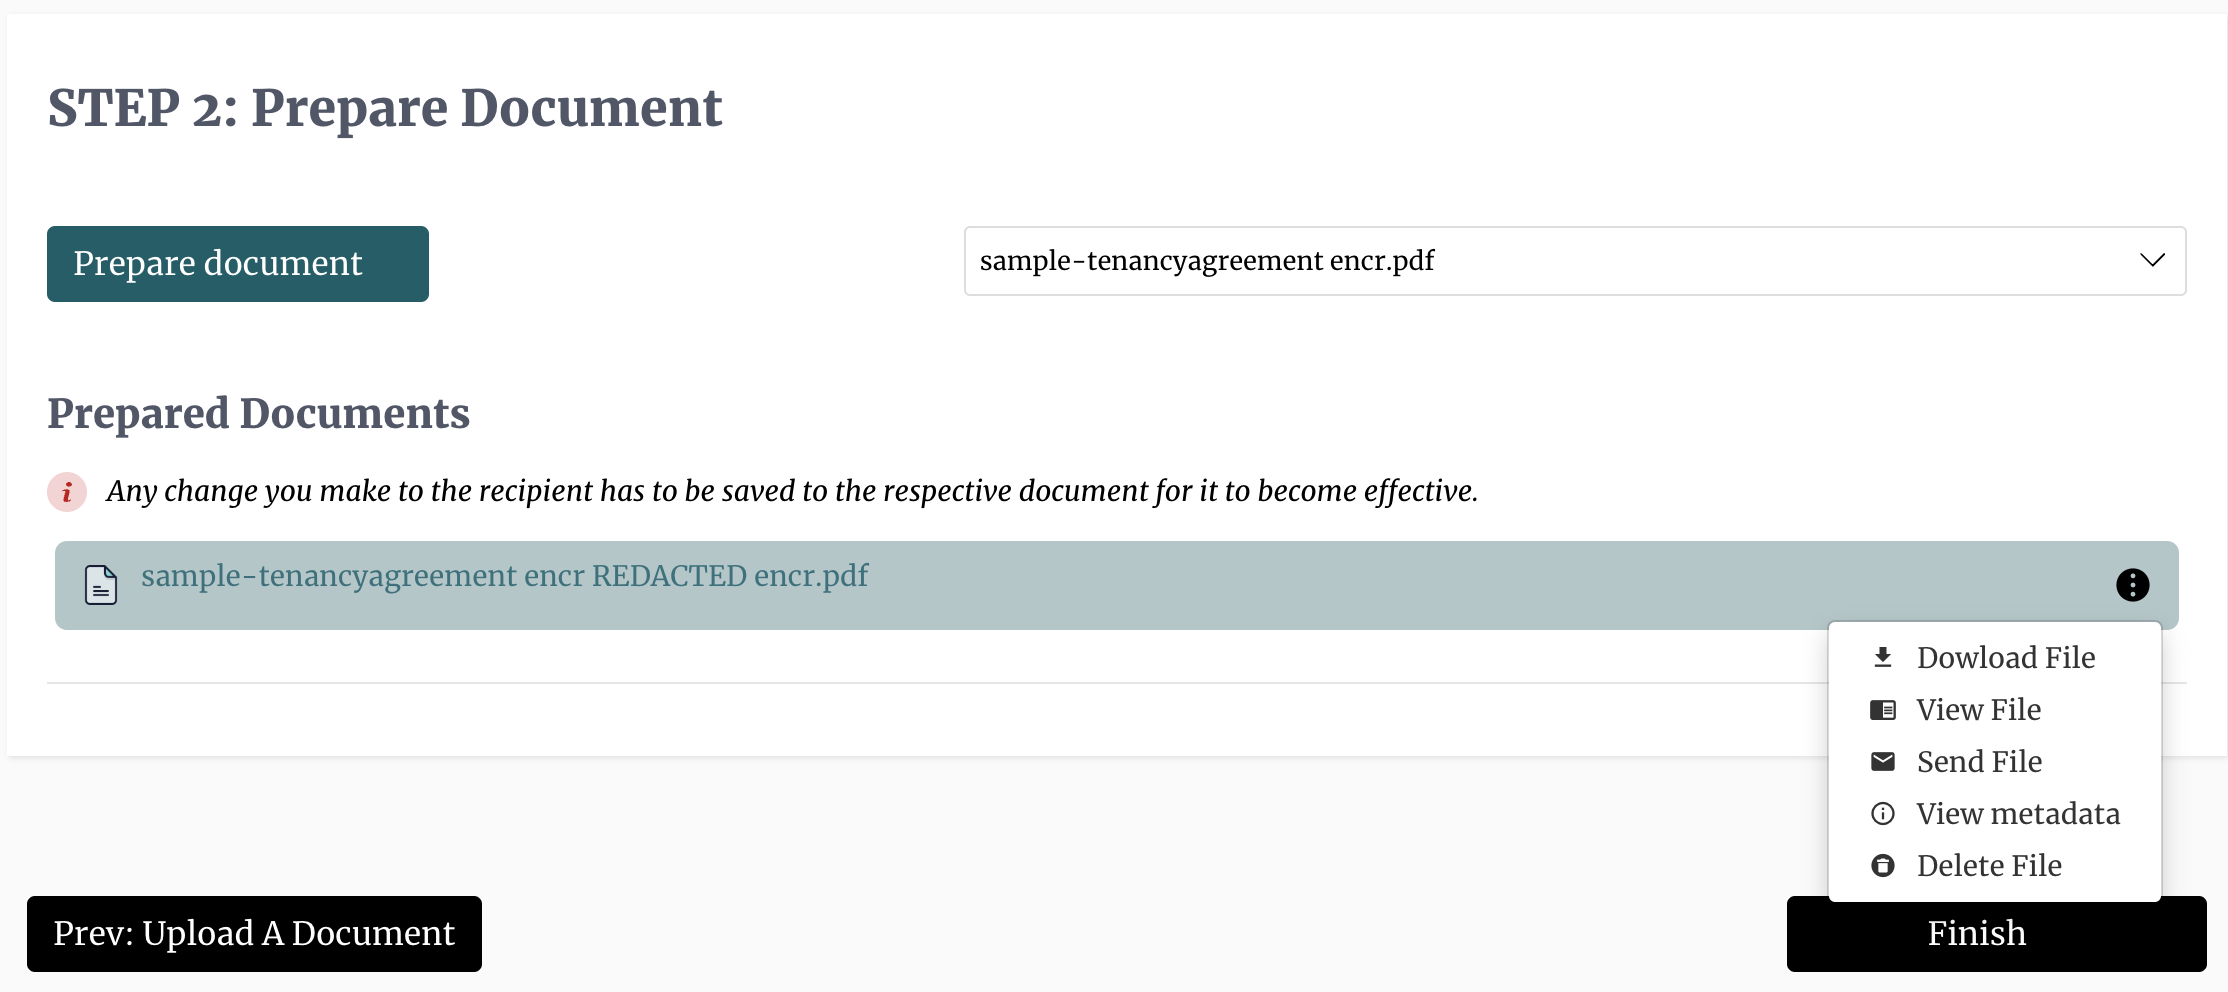
 3. Review Document:
Upon exiting the document and clicking confirm changes, our platform will then permanently erase all the areas of the document you highlighted, including the metadata if indicated. The final version of the document will then show up in the list of redacted documents. From here, you can view the file and its metadata to check if everything was done according to your specification. You can also delete the file or share it via email. The file will also show up in your document table, where you can also do further actions if needed. You can also access an audit trail of the items that have been redacted.
3. Review Document:
Upon exiting the document and clicking confirm changes, our platform will then permanently erase all the areas of the document you highlighted, including the metadata if indicated. The final version of the document will then show up in the list of redacted documents. From here, you can view the file and its metadata to check if everything was done according to your specification. You can also delete the file or share it via email. The file will also show up in your document table, where you can also do further actions if needed. You can also access an audit trail of the items that have been redacted.
Whether you're handling 10 documents or 10,000, our AI-powered signing assistant will save you time, reduce errors, and close loops faster.
© DocEndorse. All Rights Reserved
Resources