Company Logo
DocEndorse
Help
Get Started Get Started
Home Help Blog
  • Getting Started
    • Account Opening
    • Purchasing A Plan
    • Set Up Account
    • Adding A Digital Signature and Initials
    • Setting Permissions
    • Sending Your First Document Out For Signature
    • Self-Signing A Document
    • How A Recipient Signs A Document
    • How Does This Work
  • General
    • Managing Notifications
    • Handling PDF Copies
    • Customize date format and time zone
    • Set Up Branding
    • Set Acceptable Signature Types
    • How To Upload Documents
    • Password Protect Signing
    • Requesting Signer Attachments
    • Adding An Attachment To Requests
    • Ewitnessing A Document
    • Getting Documents Signed In Person
    • Tracking E-sign Requests
    • Handling Audit Trails For E-signatures
  • Users and Teams
    • Creating A Team
    • Invite New Users
    • Inviting New Team Members
    • Inviting New Members To A Sub-team
    • Sharing Documents With Team Members
  • Productivity
    • Creating A Template
    • Using A Template
    • Send Bulk Signature Request
  • Handling The Editor
    • Adding Object Fields
    • Resize, Remove, and Move Object Fields
    • Sign, Date, or Initial a Document
    • Setting Editor Layout
    • Approve or Disapprove A Document
    • Responsiveness of the Editor
    • Live Search Document
    • AI Powered Field Detection
  • Integrations
    • Integrations
    • Google Workspace Integration (DocEndorse Connect)
    • Connect With Office 365
    • Signing/Redacting Documents Within Microsoft Outlook
  • Collecting Payments
    • Connecting to Your Bank Account
    • Managing Your Payment Transactions
    • Preparing Documents To Collect Payments
    • Setting Up payments On Your Account
  • Managing Contacts
    • Adding A Contact
    • Editing or Deleting A Contact
  • Reports And Analytics
    • Get Reports
  • Managing Subscriptions
    • Managing Your Subscriptions
    • Cancelling Your Subscriptions
    • Updating Your Subscriptions
    • Updating Your Payment Method
  • Redact Documents
    • How to Redact A Document
    • Quickly Find and Redact Text
  • Managing Documents
    • Managing Your Documents
  • Using The Ai Agent
    • About Our AI Agent
    • Our Document Intelligence
    • Using the Ai E-sign Assistant

Password Protect Signing

Users can request that signatories provide a one-time password before they can access the document(s). How this is done depends on whether the user using an e-sign ai agent, or the traditional workflow. To enable password-protected signing using the traditional workflow, the user, when adding recipients during the process, clicks the "add password" button for each recipient. Clicking the add password button opens a pop-up that allows the user to enable a one-time password, and set the password delivery method for each recipient. If using an ai agent, the agent will ask the user to provide the necessary information when the user expresses the intent to add a password to the e-sign request. Depending on the type of e-sign request, the agent may also ask the user if he/she wants to enable password protection.

Password Protect Documents

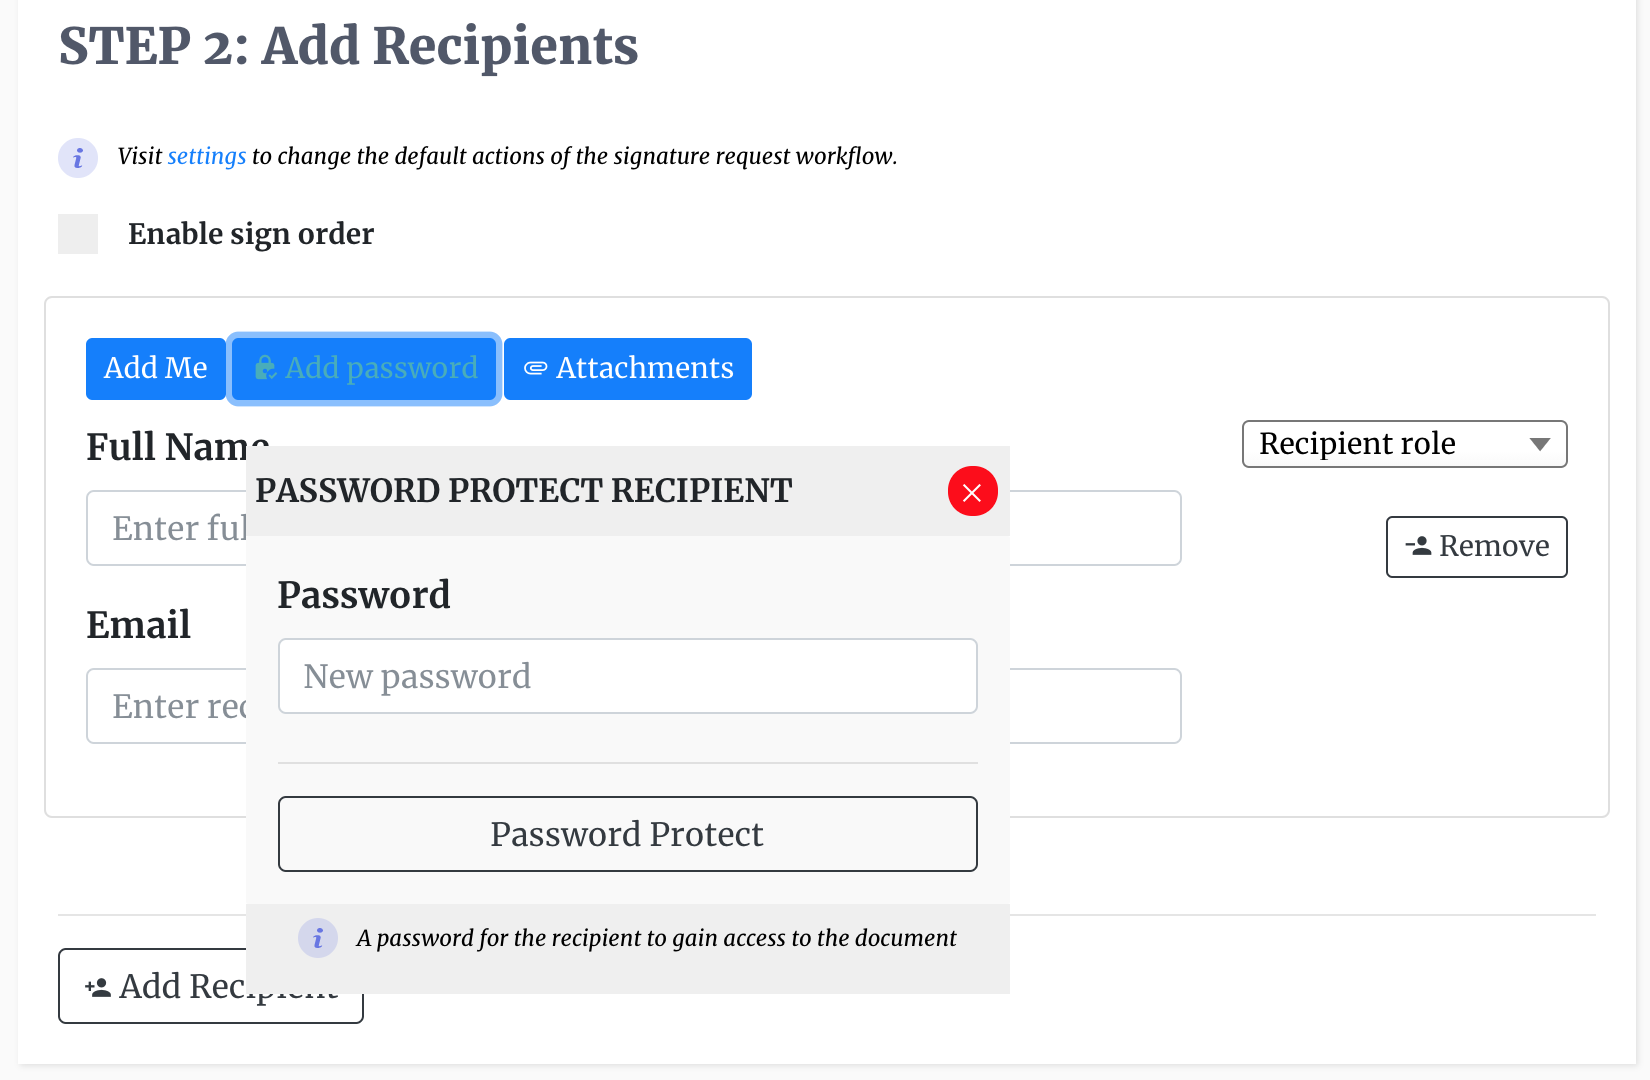
After the document is sent out, the recipient will now have to enter a password to access the document as an additional security measure. The password will be randomly generated by our platform, and sent to the recipient by the user's choosen delivery method.

Company Logo

Whether you're handling 10 documents or 10,000, our AI-powered signing assistant will save you time, reduce errors, and close loops faster.

© DocEndorse. All Rights Reserved

Connect with us:
Facebook Twitter

Product

Pricing
Features
Book a demo
E-sign For Free
Integrations

Resources

Legal
Compliance
Help Center
Blog

About

Contact
Privacy
Terms